Late in 2018 I stumbled onto the practice of Bullet Journalling. I’ve always been an organized person. My high school agendas were well used (as well decorated with all sorts of magazine cut-outs and photos of my friends). I’ve always been a list person. As a kid I made a 2D model of my bedroom and the furniture in it to test out various furniture configurations before moving anything.
I’m pretty A-type if you haven’t guessed yet … haha!
So when I heard about Bullet Journals (BuJo for short) it sounded like just what I needed! I had been making use of digital calendars for a while but I missed putting pen to paper to plan my days. I don’t even remember how I first came across the idea of BuJo so I apologise that I can’t give credit to whoever inspired me. I started to read up on it online, watch videos and eventually read the book The Bullet Journal Method by Ryder Carroll who came up with this method.
Then I got started right away – in the middle of November. In a small notebook I had on hand. With whatever pen I had on hand too. I blogged about it once I’d been at it for a few weeks; you can read that here. [edit: in putting in the hyperlink for that blog post I realised I did say in the post where I first heard about BuJo!] And while I’m due for a new blog post on the topic to update how I’ve used it & how my BuJo practice has evolved over the last 3 years, I decided to make a Learning in the Loo poster on the topic. I’ve been sharing about BuJos in my Time Management workshop I’ve given to a few classes this semester and it’s been so fun to see a few students and teachers really dive into using Bullet Journals too.
So here’s my latest Learning in the Loo poster:
Have you tried Bullet Journalling or something similar? Let me know in the comments below.
As always, all my past editions (including this one) of Learning in the Loo can be found here.
– Laura Wheeler (Teacher @ Ridgemont High School, OCDSB; Ottawa, ON)
As a sketchnoter I have heard about Bullet Journals for a while.
This fall I listened to the Sketchnote Army podcast episode with Ryder Carroll, the inventor of the Bullet Journal method. It got me interested enough to order his new book, the Bullet Journal Method. And now I am obsessed. Not only that, but several colleagues (and even students!) that have seen my bullet journal seem interested in learning more and starting their own! For now I’m using a dotted 5″x8.25″ soft cover moleskine. Before January I’ll get a hardcover notebook (probably the LEUCHTTURM1917 or the official Bullet Journal notebook). But the beauty of the bullet journal is you don’t need any specific journal. You number each page yourself as you go & add all the structure & content yourself too.
So what is Bullet Journalling? Here’s a video from Ryder himself about it:
A word of note: if you google bullet journalling (or Bujo as it’s often called) you’ll see plenty of images & videos showing very fancy calligraphy and intricate artwork. That is not was Bullet Journalling is about. Some people like to do it that way which is great. But I really like reading about Bullet Journalling from the creator himself because he really comes at it from a function & purpose persepective that is not about art (which appeals to me as a sketchnoter . . . as Mike Rohde always says: “ideas, not art”).
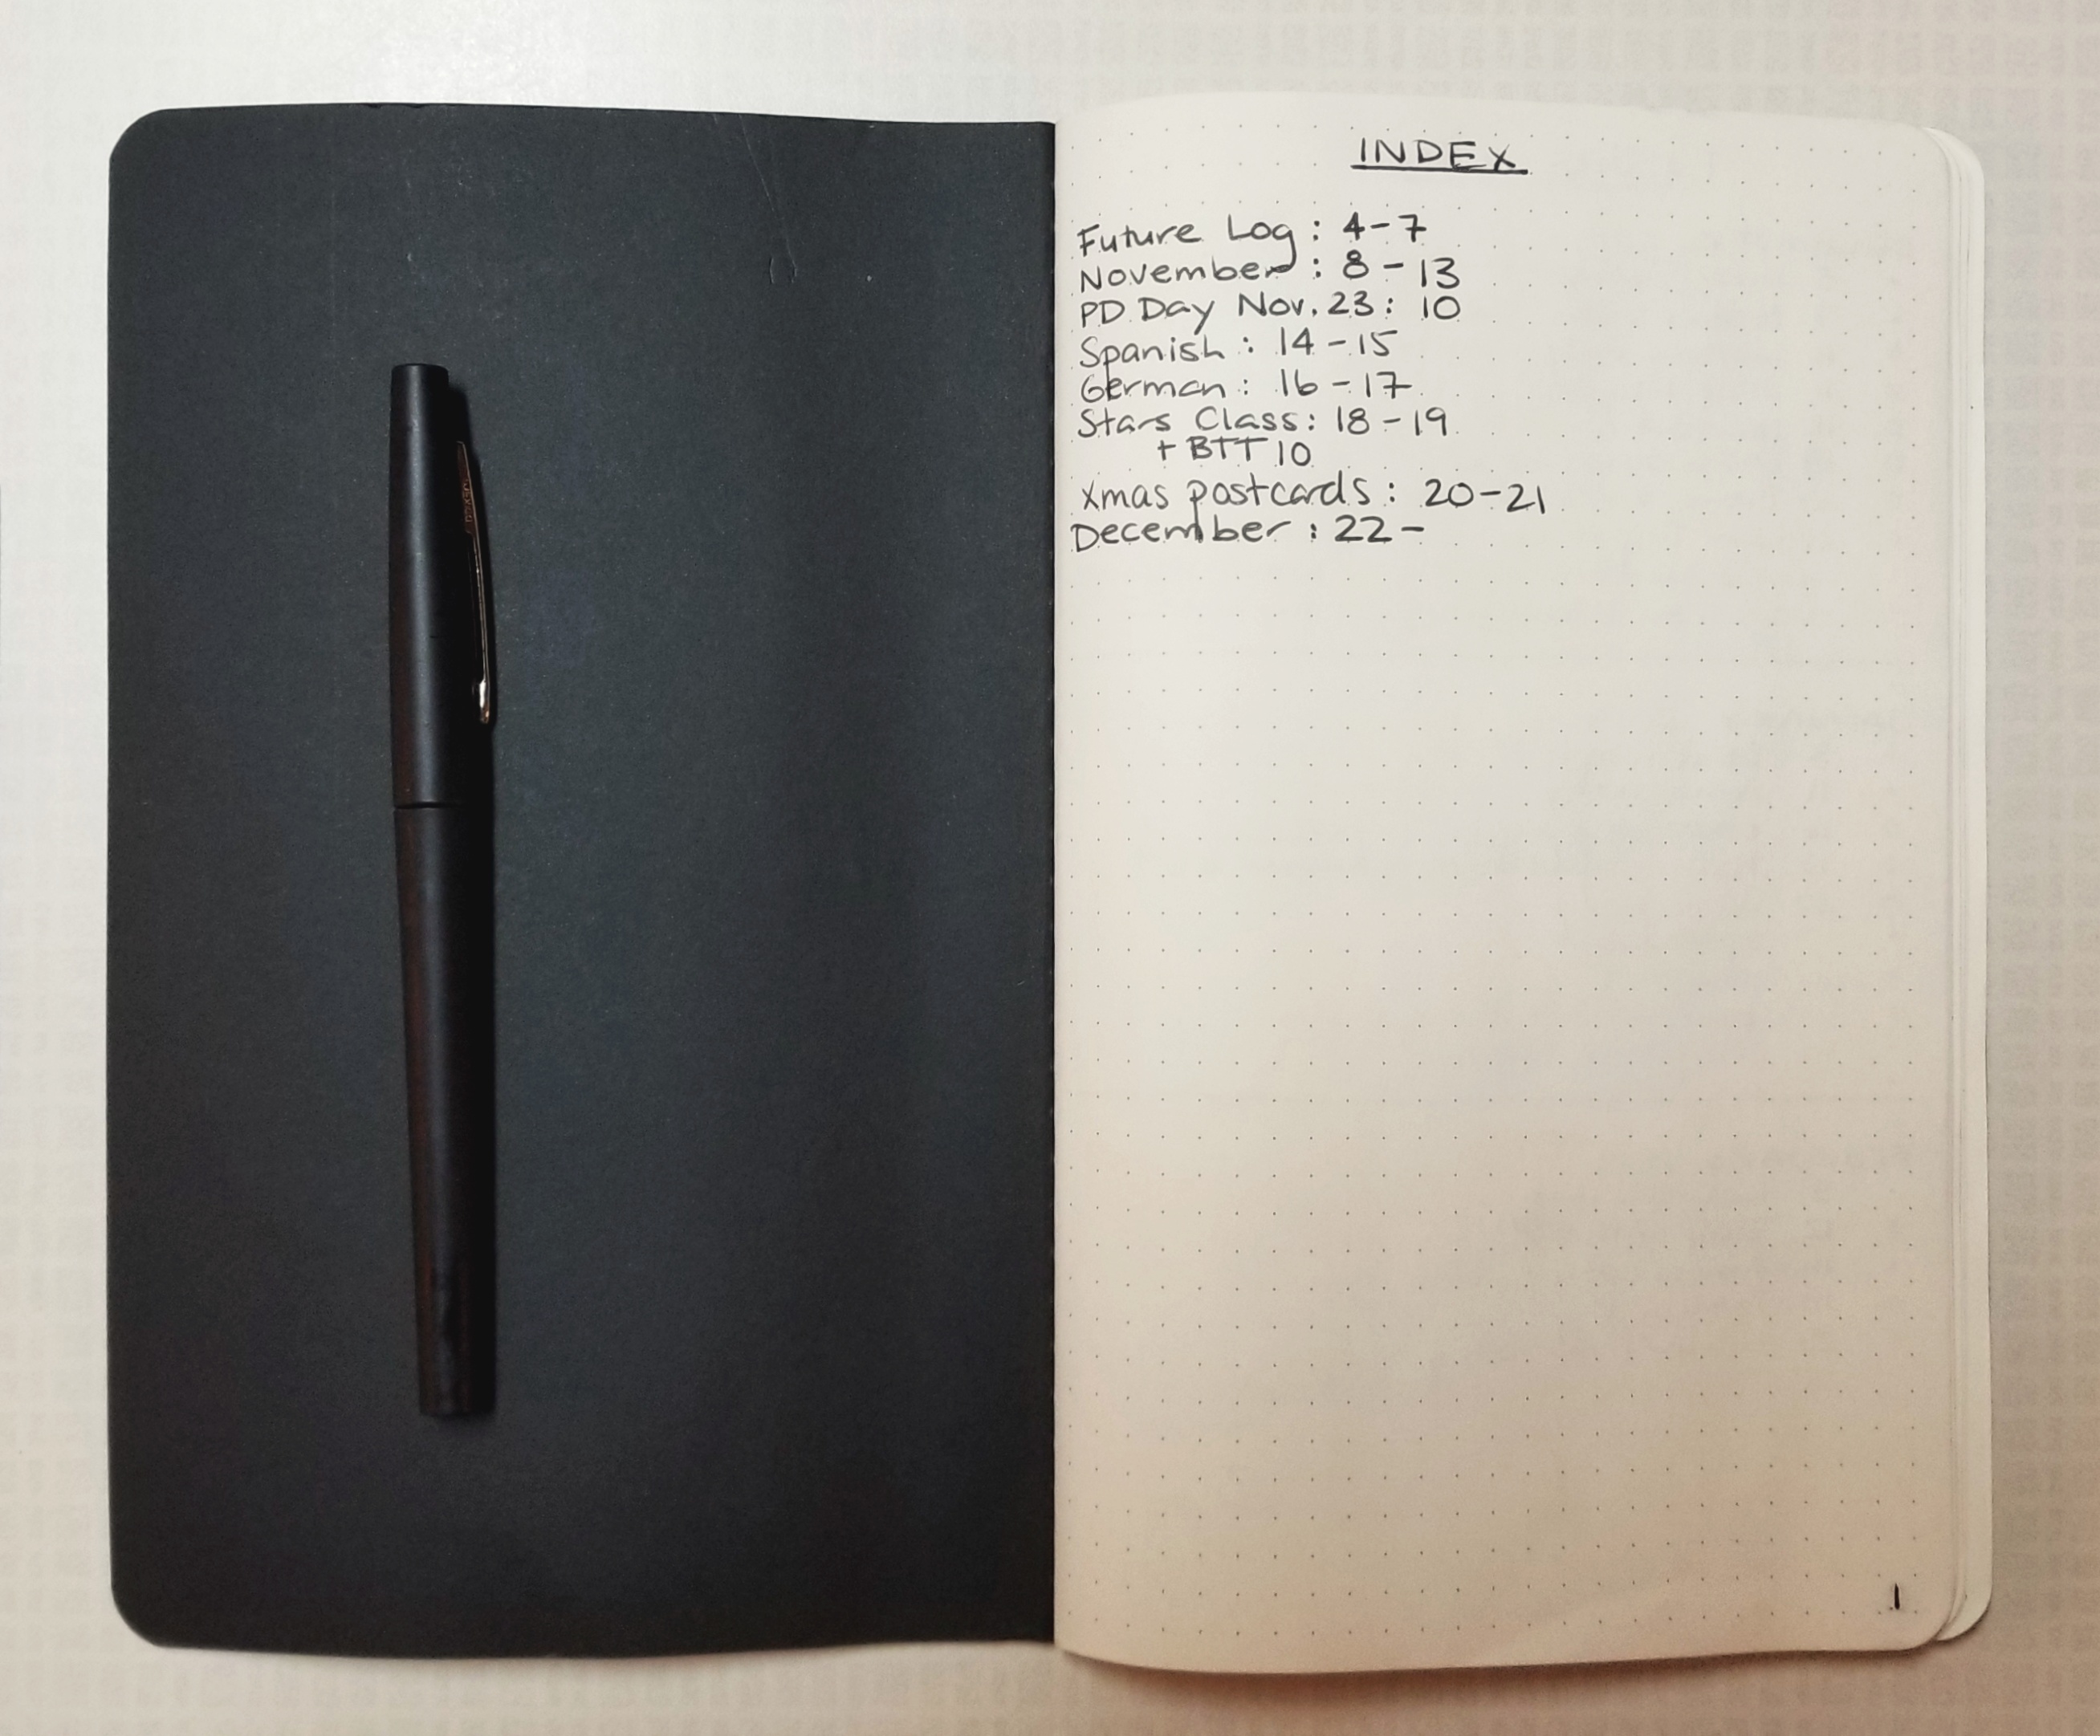
Index
You start with the first 4 pages for your index:
The index is like a table of contents – as you create sections of your bullet journal, you’ll write down the page numbers for each topic or month. So if I take 2 pages for the new Spanish words I’m learing on Duolingo now & then another 2 page spread later in the notebook, all those page numbers will be listed next to “Spanish” in my index. Makes it easy to find. Now I made the mistake of starting on the actual first page. Next time I’ll use this page to create a “if found, please return to … / contact …” cover page & start the index on the back of the first page; 2 two-paged spreads for it.
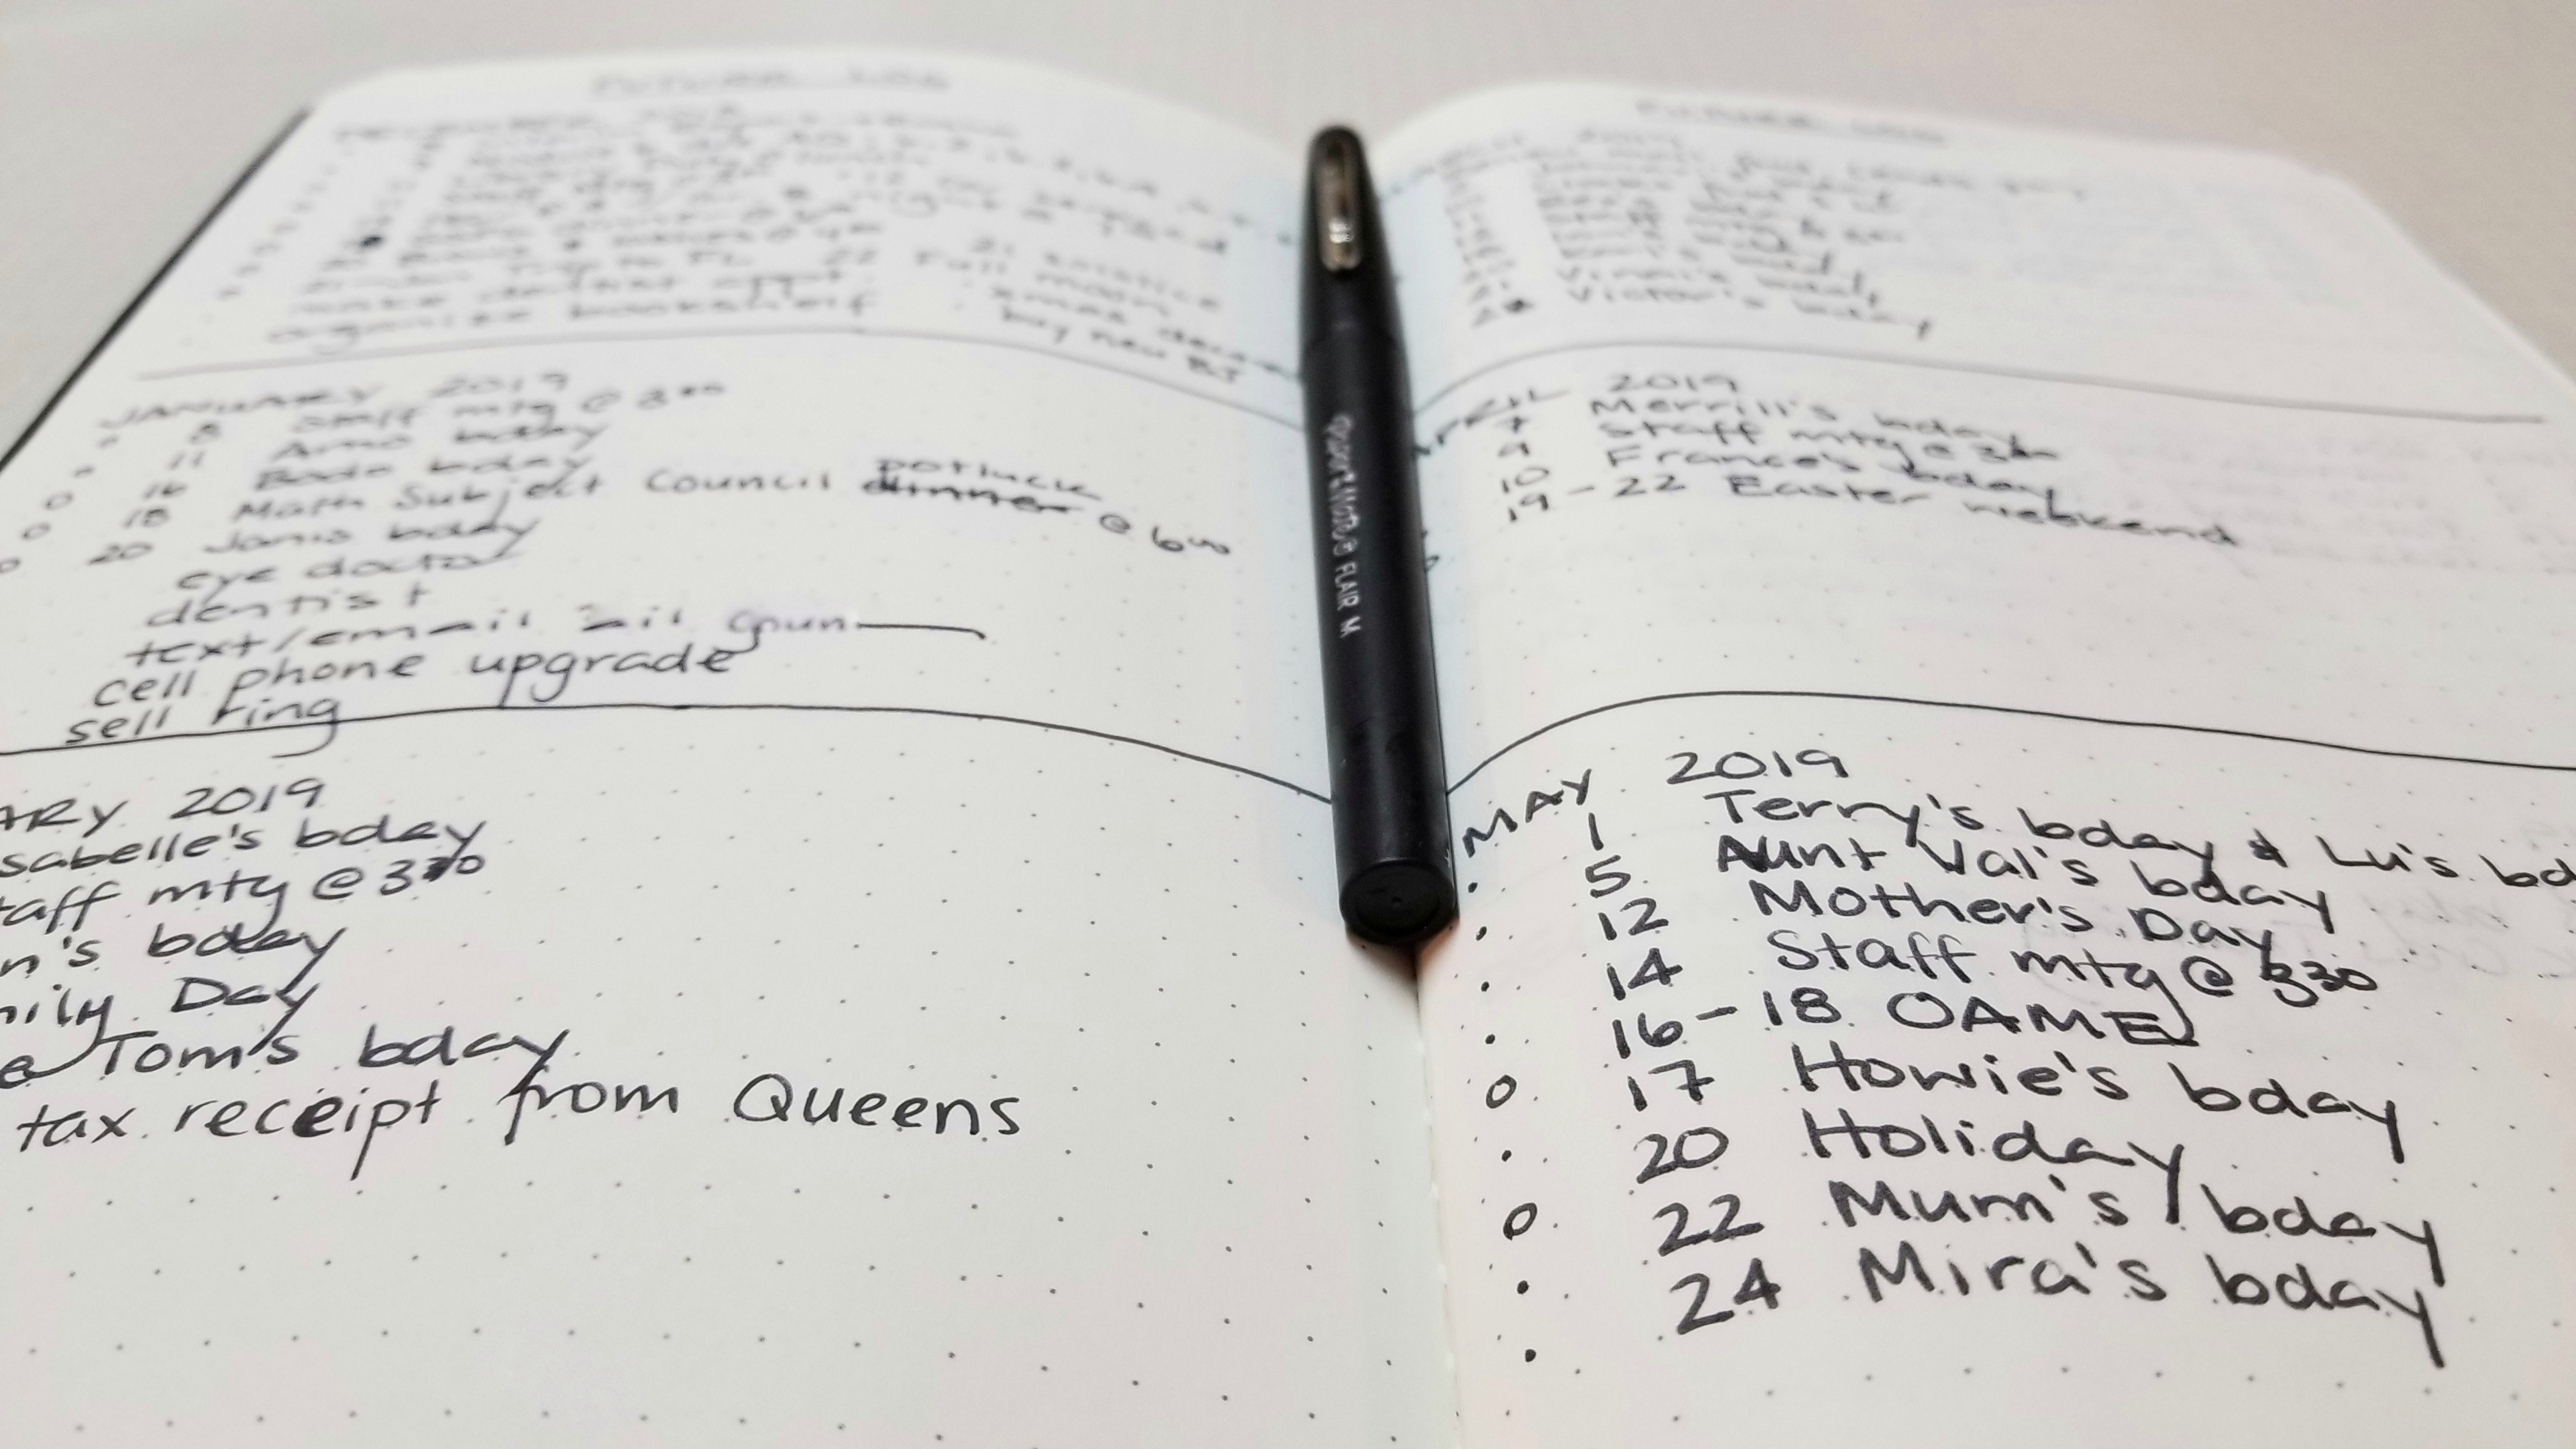
Future Log
Next up you create another 2 two-page spreads with blocks of space for the next 11 or 12 months of the year.
This is where you list all of the events & tasks that are not happening in this current month. I prepped this by going through the calendar on my phone (which I am still using in addition to my bullet journal – I do like the pop up reminders of things there … and also useful when my bullet journal isn’t on me & I need to record the date of something coming up).
And go back to your index and list the future log w/ its associated page numbers.
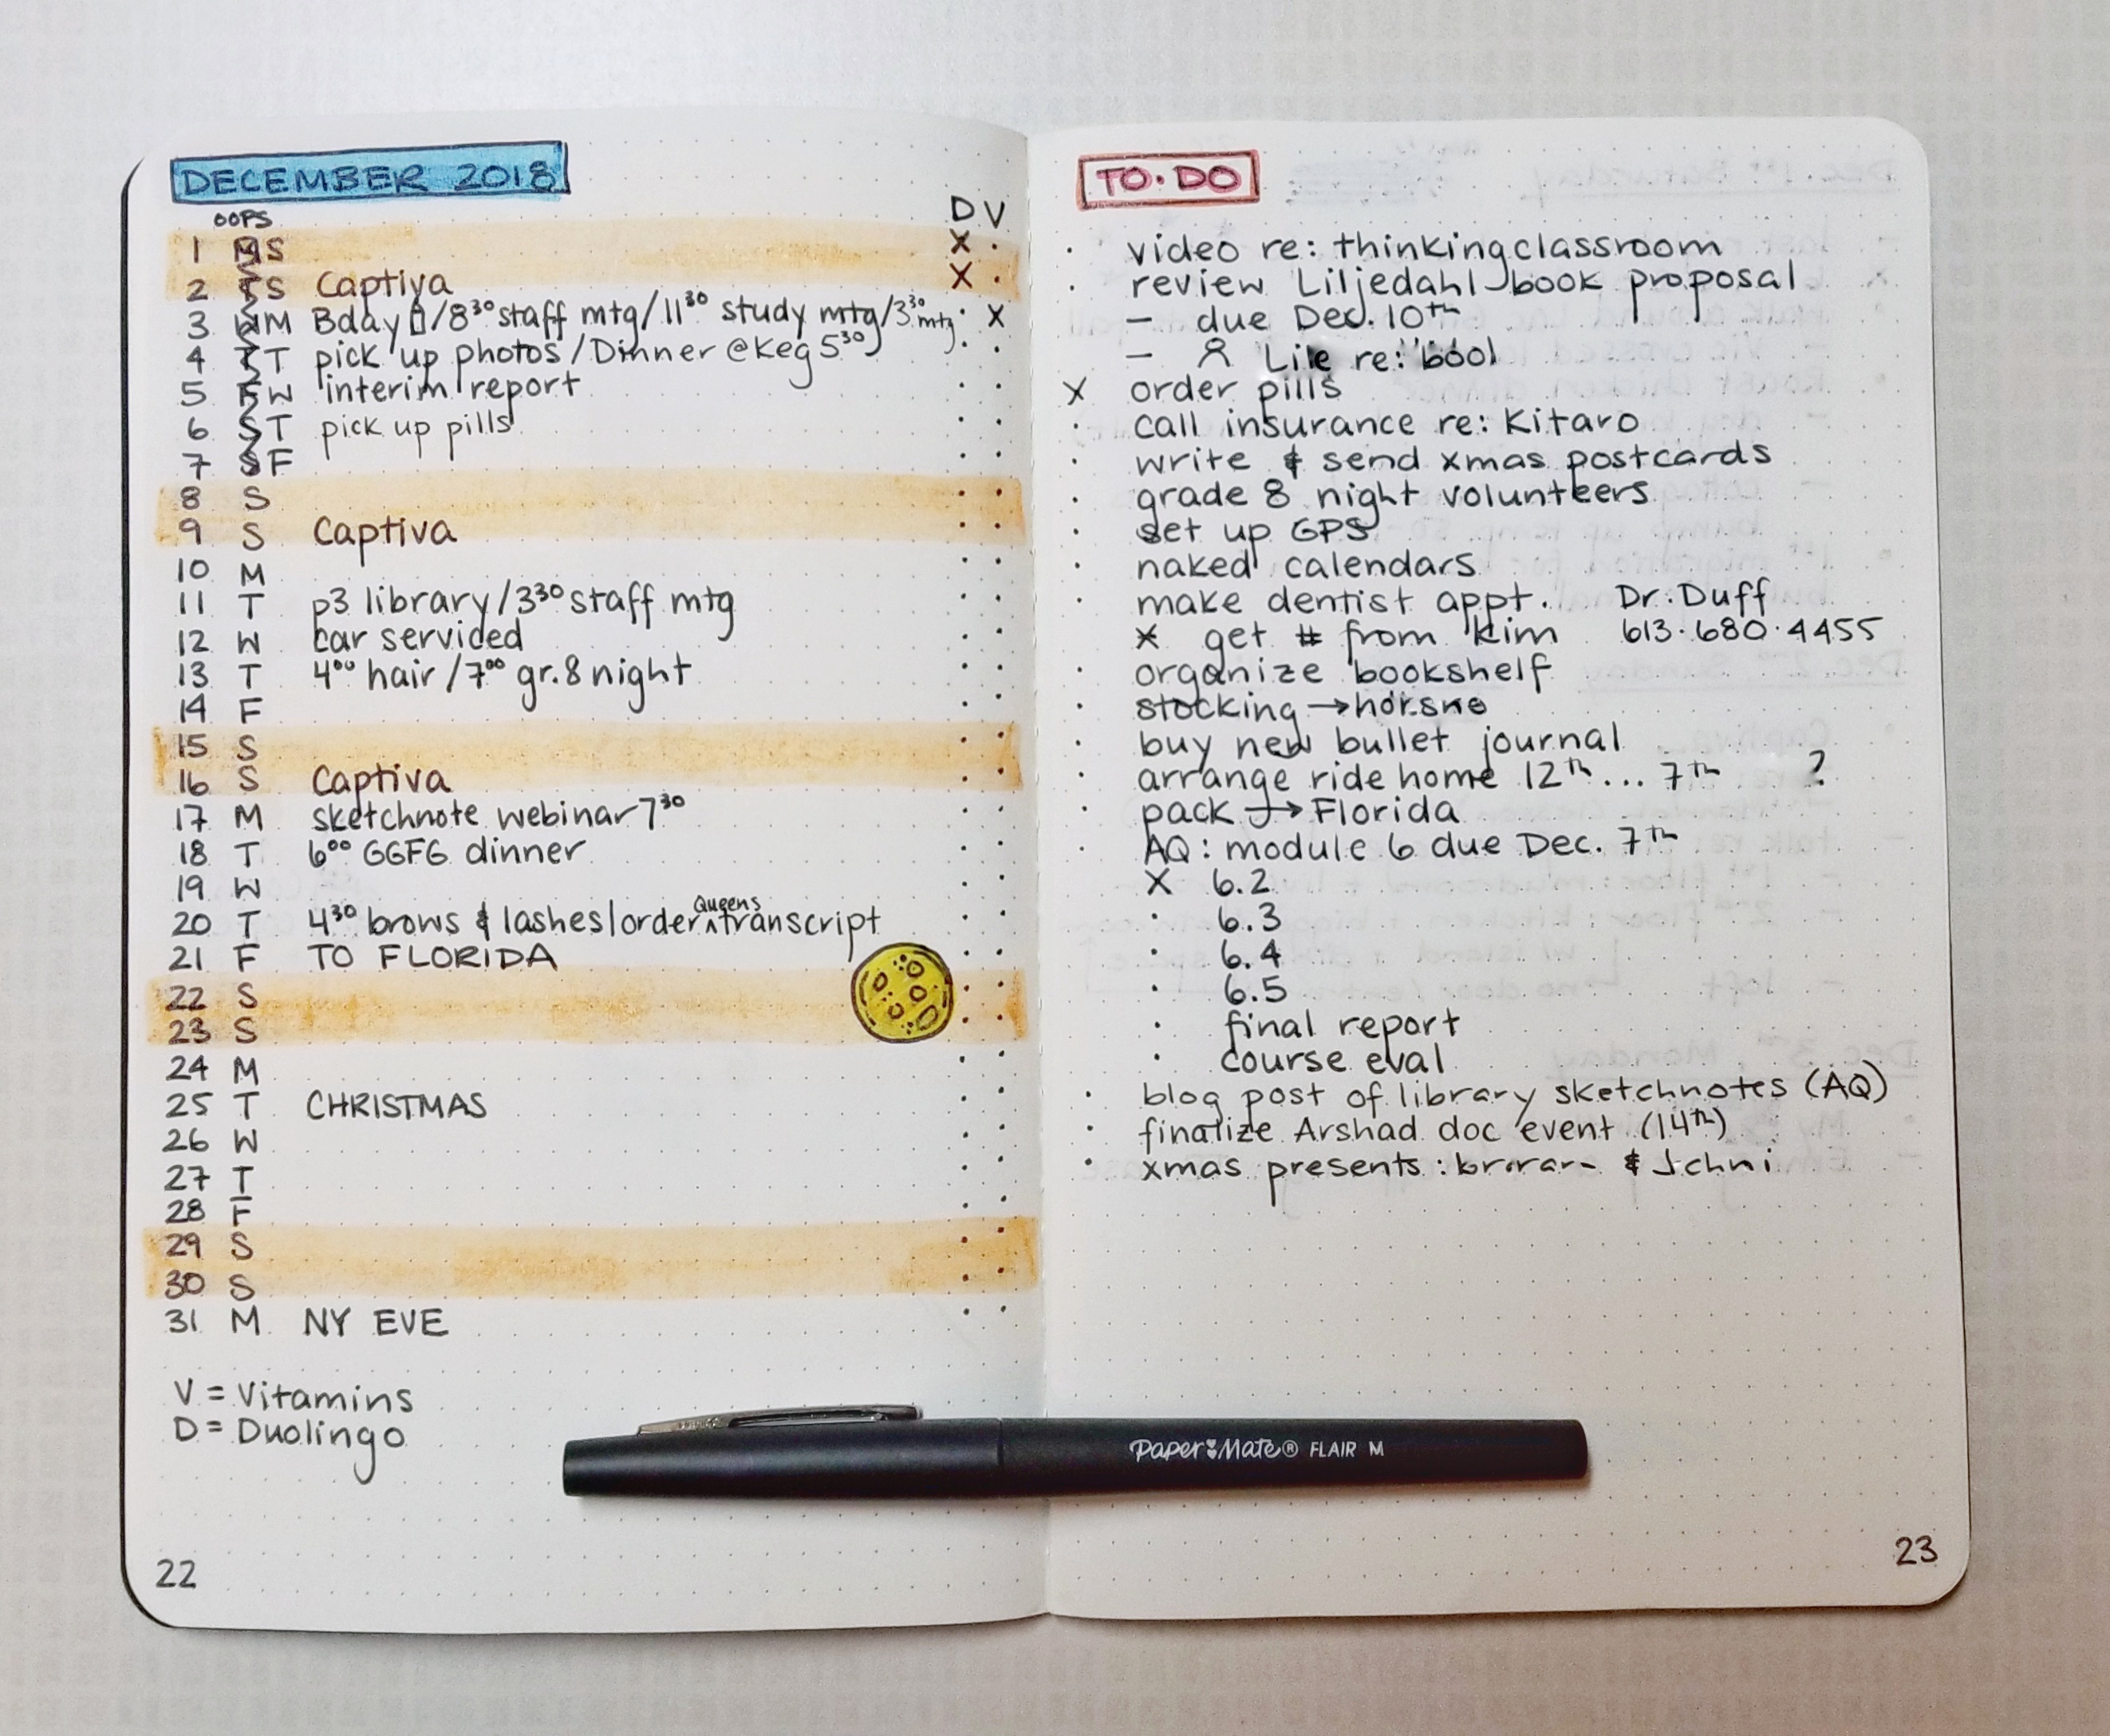
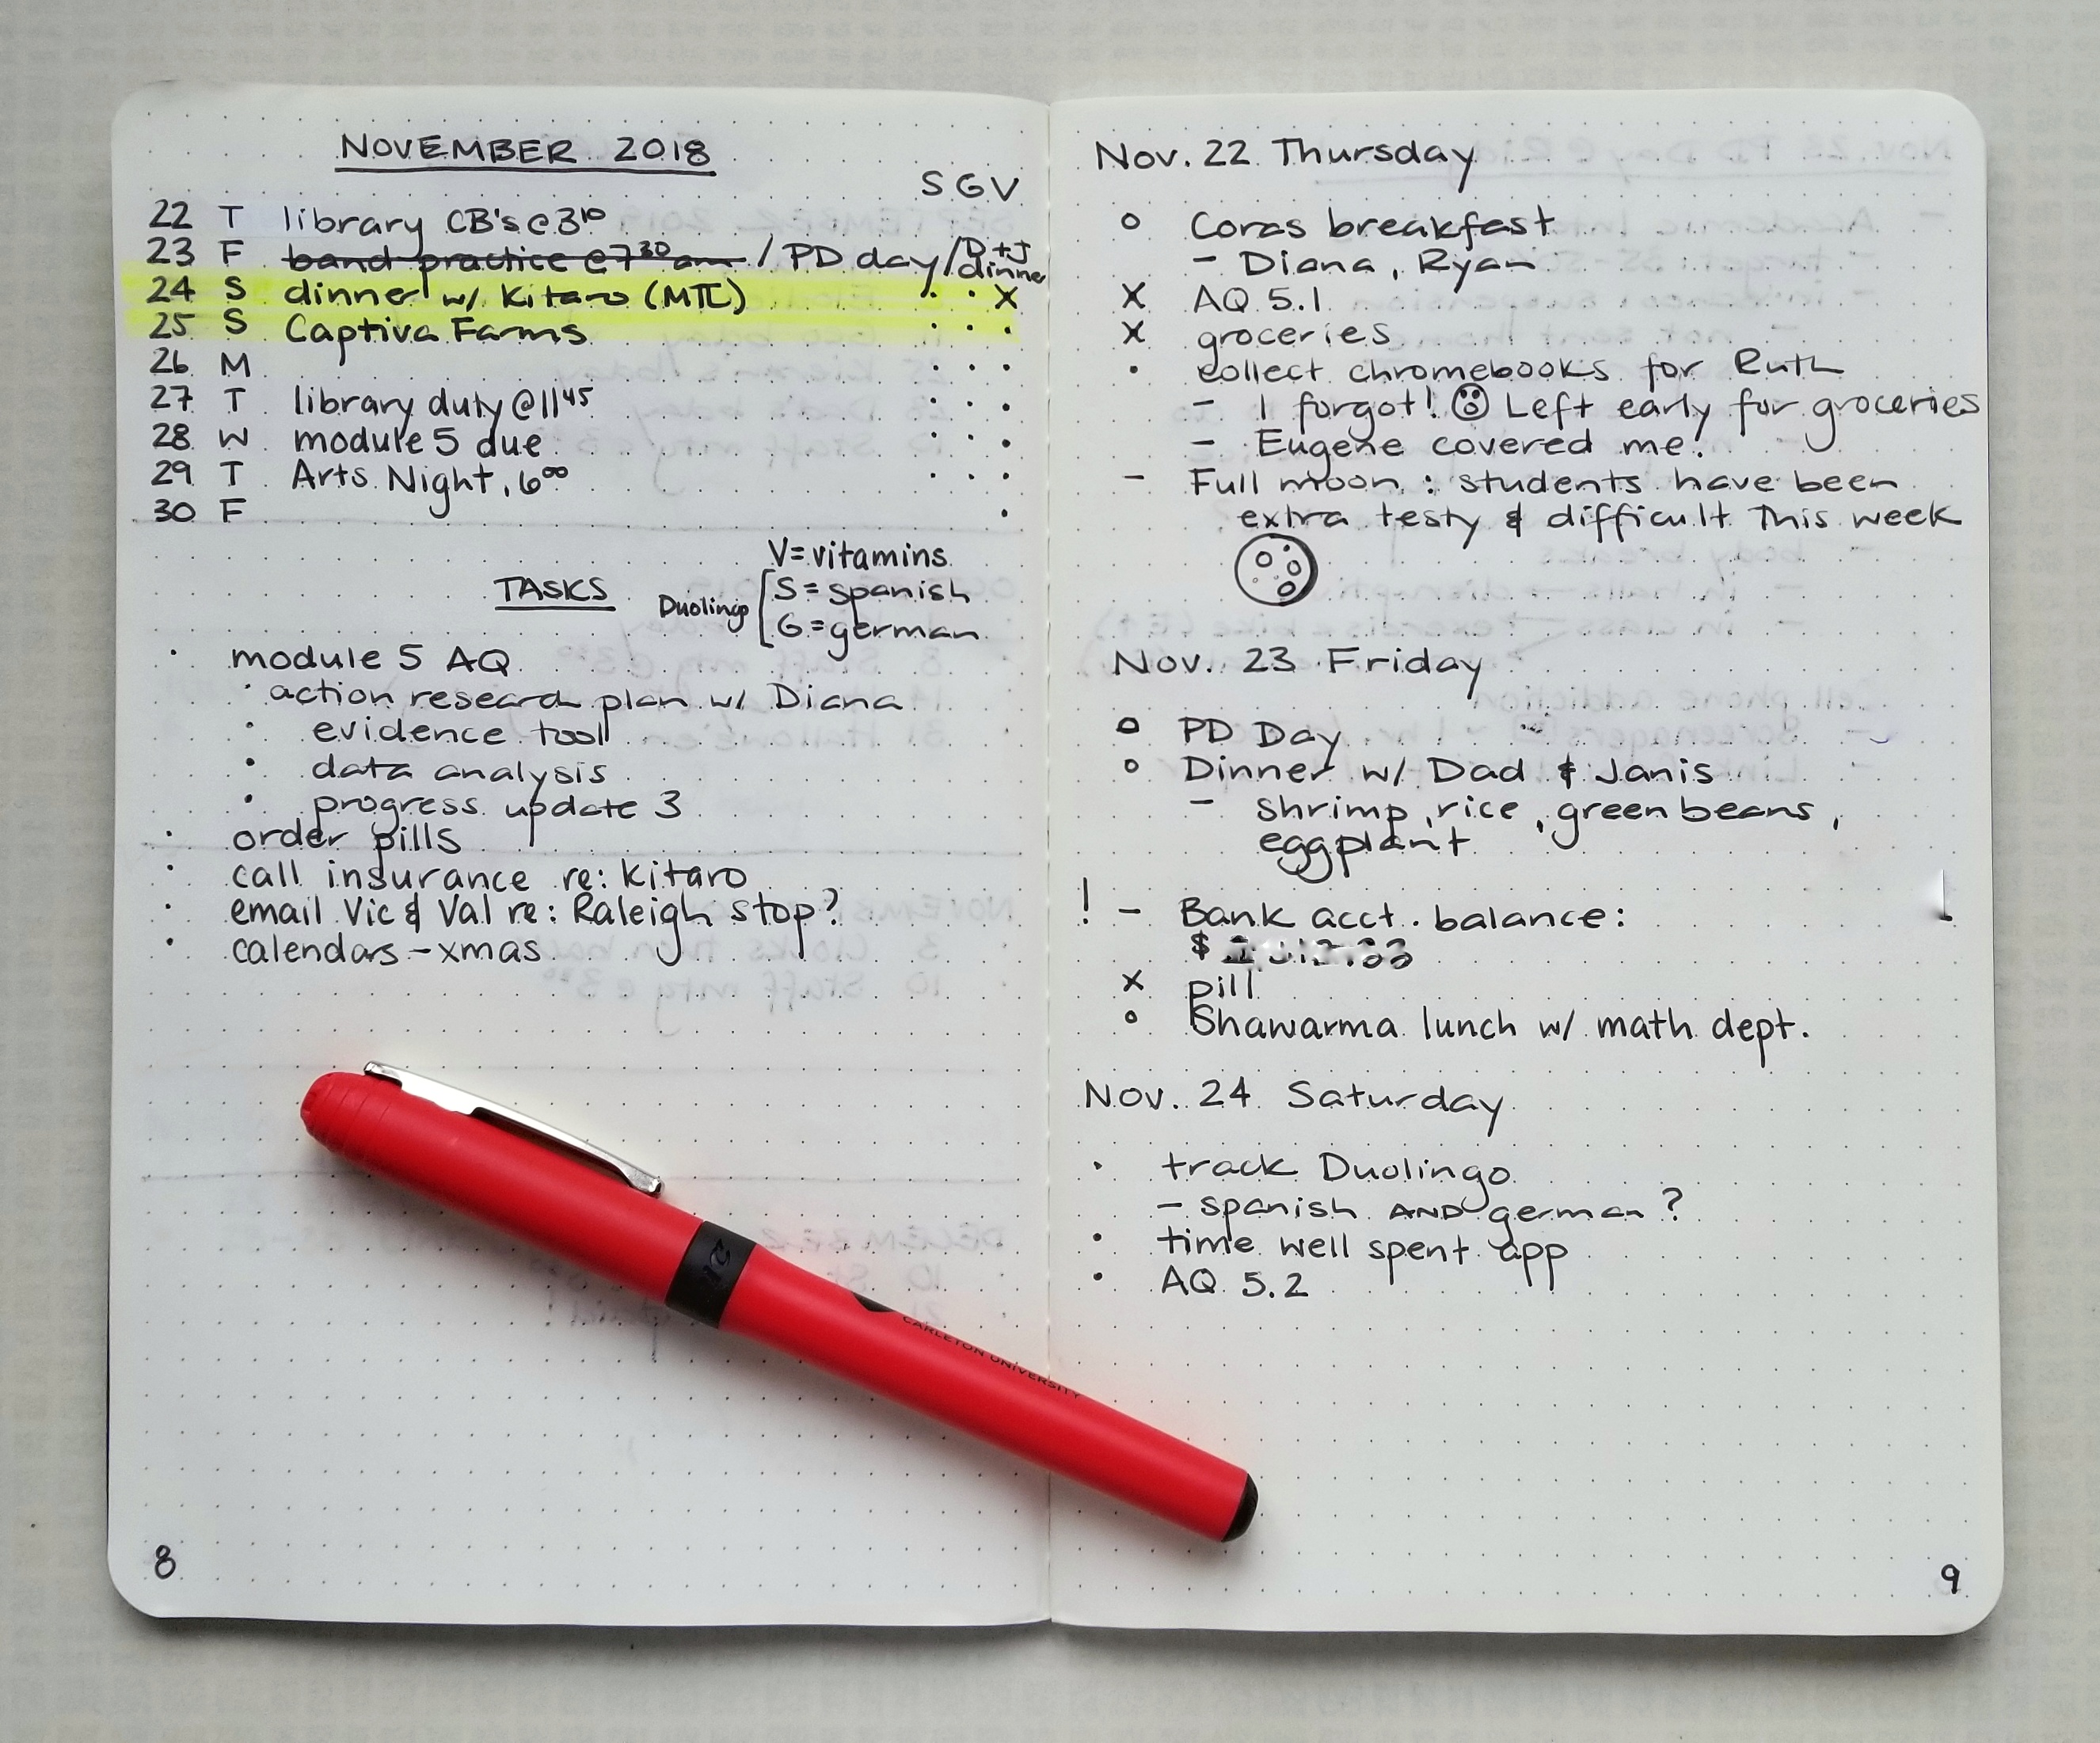
Monthly Log
So now we create a monthly log for the current month.
On the left of the two page spread you write the days of the month down the left side; number & first letter of the day. I write the main things I need to remember happening each of those days. On the inside edge of that left page I have my habit tracker which starts as a dot for each of the 2 habits I want to track; Duolingo practice w/ Spanish & German and taking my vitamines. Each day as I do it, the dot turns into an X to indicate it’s happened.
On the right-hand page you create a list of tasks you want to accomplish in the month. Tasks (indicated with a dot) get Xed out as they are completed.
List this month and its starting page number in your index.
Daily Logs
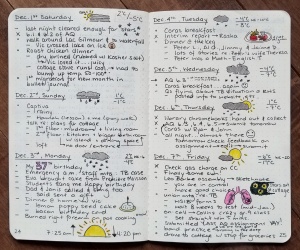
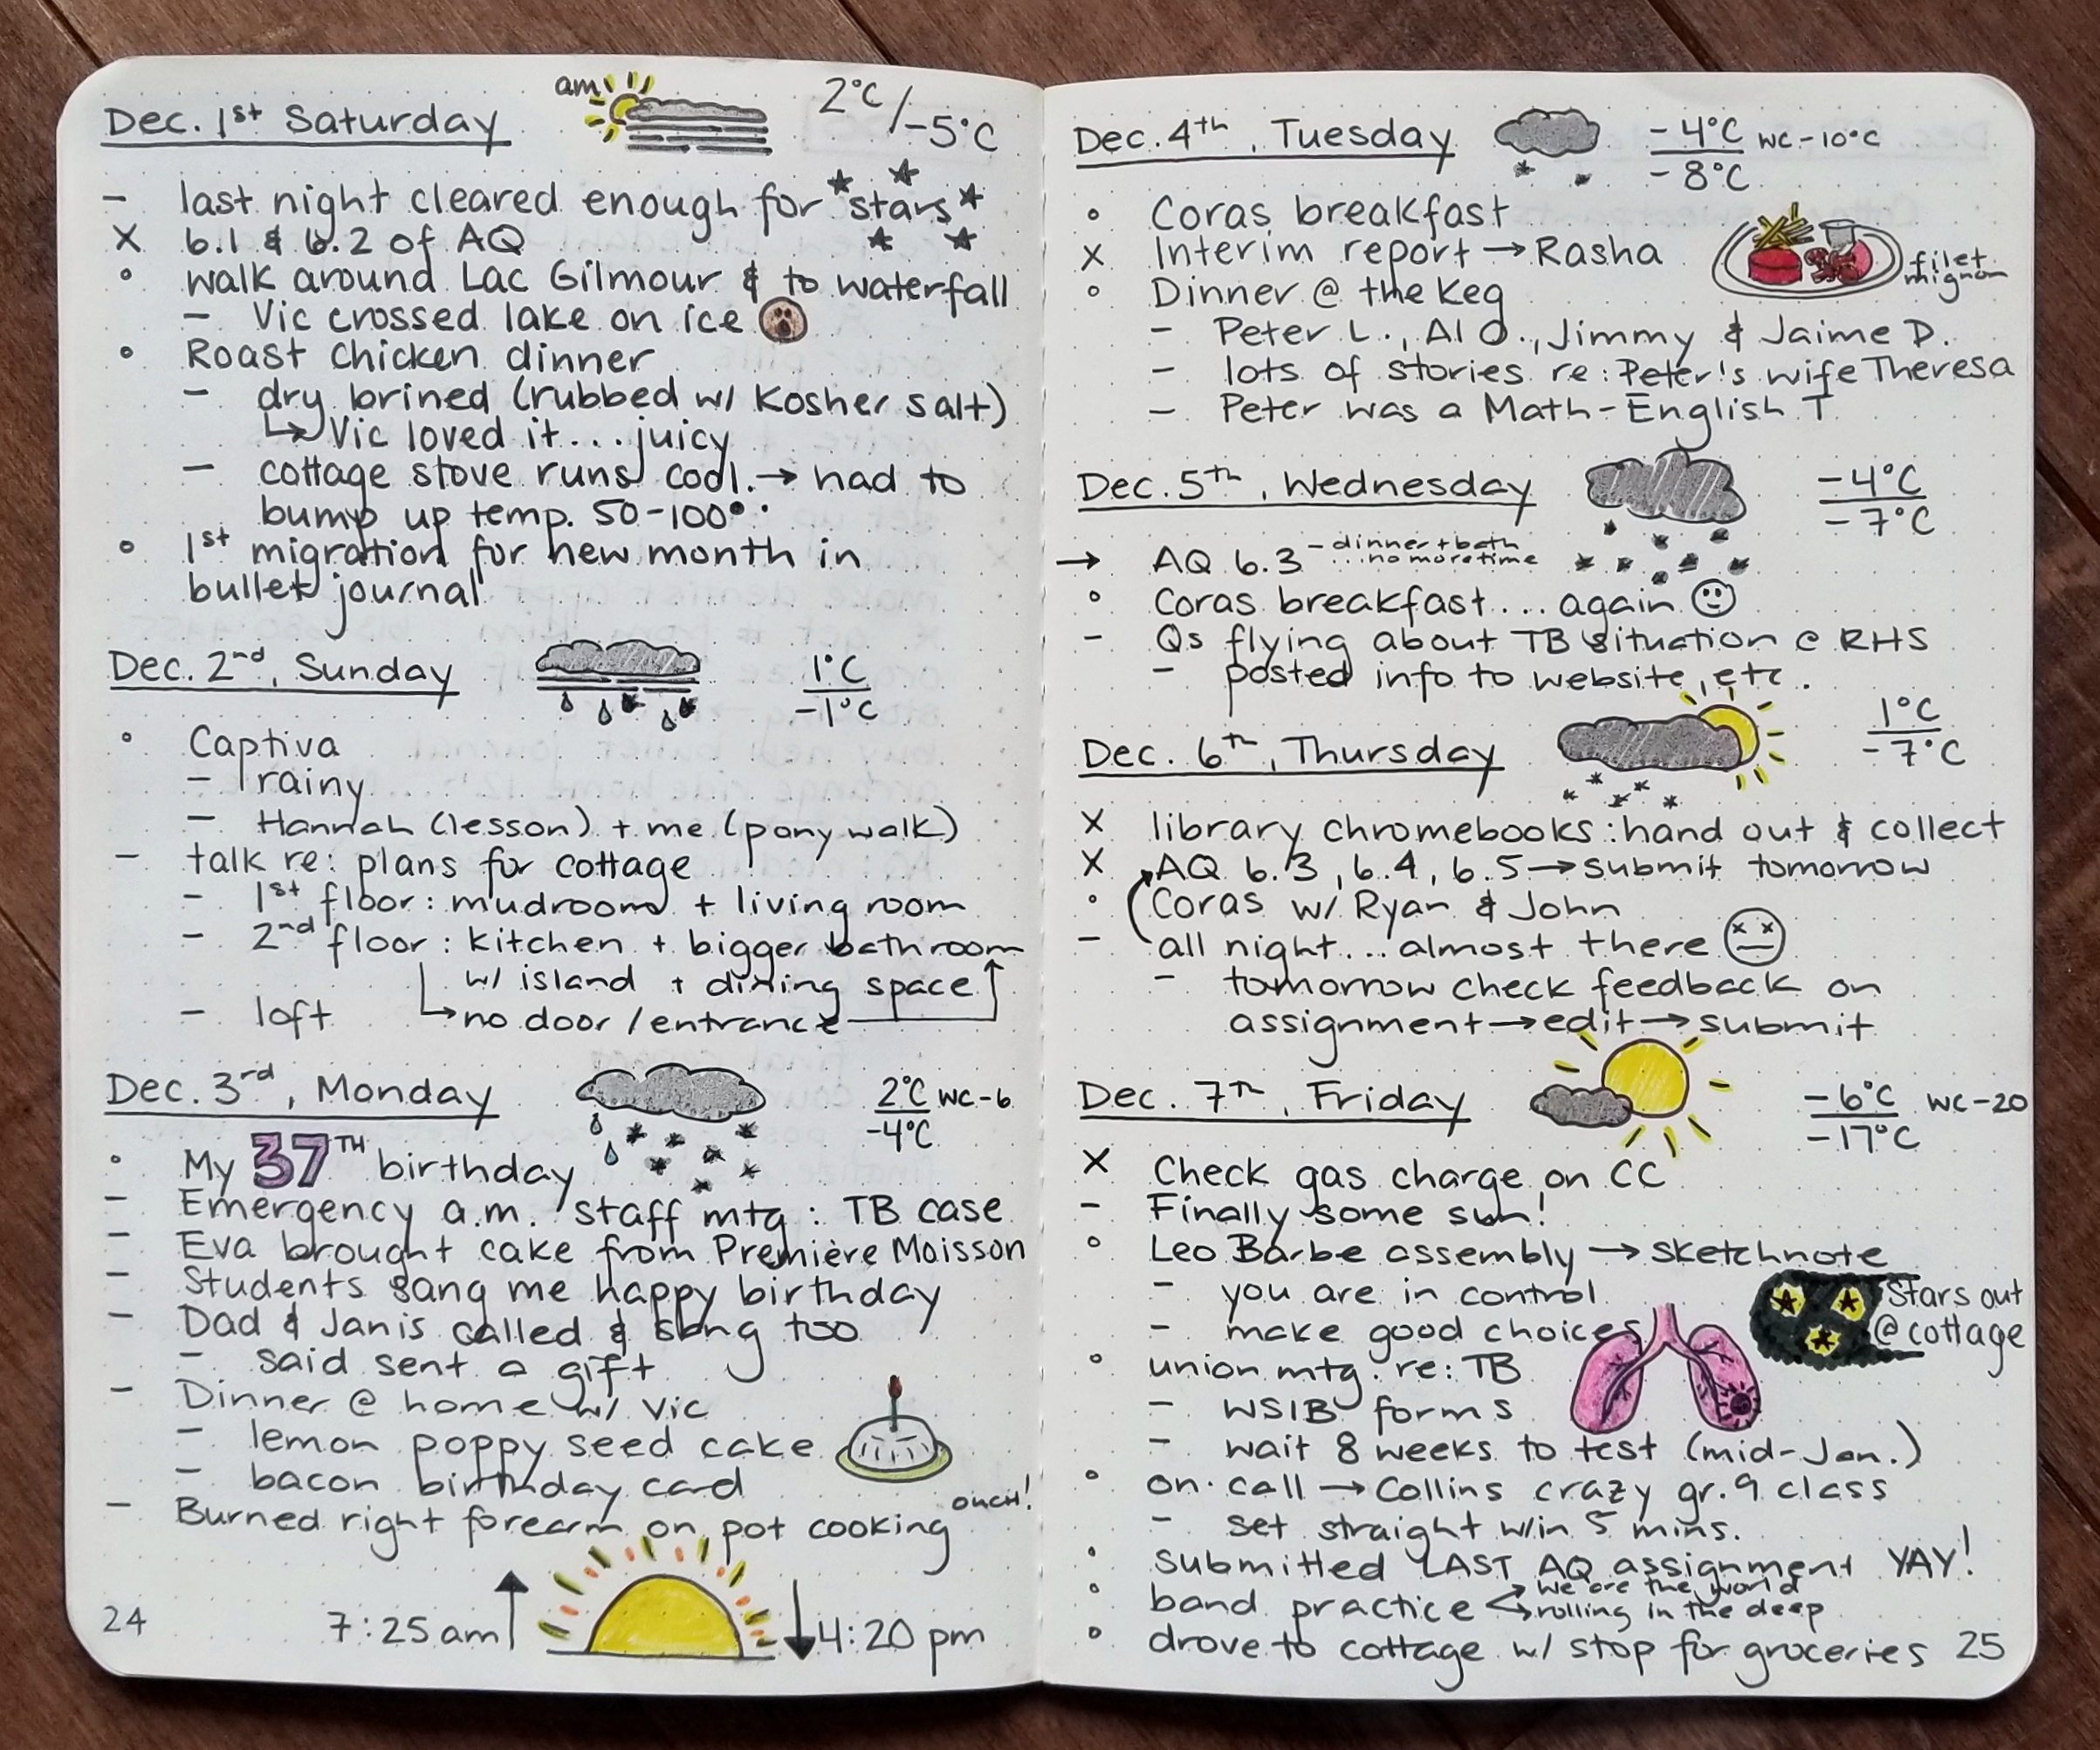
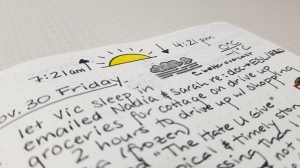
Starting on the next page, put the date for the first day of the month. And here is where you plan, log tasks/events/notes & reflect on each day.
Tasks start as a dot then turn into an X if they get completed, a > to say it’s been migrated forward to another day in the future or < to say it’s been migrated back to the monthly or future log. I’ve started using arrows rather than < and > myself. The hollow circle indicates and event or something that happened. The dash – is a note. And of course things can be nested under each other using the various symbols. Some people will adjust the symbols to better suit themselves which also works.
I’ve started tracking the the sunset & sunrise times once in the center of each of these daily spreads just for fun. I also create a weather icon for each day & track the day’s high & low from my weather app the next morning. I’m starting to add a few more sketches & icons as I go to satisfy my sketchnoting urges 🙂 But it’s super not necessary!
Side note: Think your handwriting sucks? Doesn’t matter! This journal is for you & no one else. Also, with practice it will get tidier. Try slowing down slightly as you write and being really purposeful in your pen strokes – that often helps!
Migration
So then at day’s end take time to reflect on your day & add to your notes about the day. Cross off completed tasks. Migrate tasks forward to tomorrow or back to this month’s task list.
At month’s end go through your month’s task list. What did you complete? Cross it off. What remains? Is it worth moving forward? If it’s still important to you, migrate it forward to the new monthly log & mark it with >.
At year’s end . . . I haven’t experienced this one yet. But the main thing I know Ryder – the creator – suggests is to start a new notebook for the new year … even if you’re current one still has room. Fresh start. Blank slate and all that.
Collections
The last element of the basic bullet journal is what Ryder calls Collections.
Collections are two page (or more) spreads for things you’re working on. For example, I have a collection for both the Spanish and German I’m learning with the DuoLingo app. I have a collection spread I’m using to plan what I do each day w/ 2 of my classes. I have another collection spread to organize who I’m planning on sending holiday postcards to. These can be for notes from PD days, meetings, courses you’re taking … whatever you want! Just create a 2 page (or more) spread & list the topic & page numbers in your index. The next time you create a spread for that same topic or project, you’ll add the page numbers next to the first set in your index (eg. Spanish, 17-18, 35-36, 47-50).
Start now!
My final advice to you is to start right now. Like, tonight!
If this seems like something that you’d enjoy & find beneficial it is tempting to say I’ll wait till Jan. 1st to start fresh & that gives me time to buy the right stuff, etc. But come Jan. 1st in the middle of the holidays … you won’t start! So I started with a week left in November. Grabbed a moleskine notebook – but any notebook you have; lined paper, blank paper, … I’m sure you have an unused or unfinished notebook lying around the house right now. No fancy pens are needed. Grab whatever pen or pencil is close at hand. And start! Think of it like a test drive as we finish December where you can learn about how you like your own Bullet Journal to work. Then you’ll be ready for a migration to a fresh notebook on Jan. 1st.
And if you do try Bullet Journalling, please come back & tell me what you think in the comments below! Consider sharing a photo if you’re willing.
Hope to hear from you soon,
– Laura Wheeler (Teacher @ Ridgemont High School, OCDSB; Ottawa, ON)